How to Setup Read-Only Access for Developers with Audit Logs
In today's fast-paced DevOps environment, ensuring that developers have secure yet efficient access to production data is critical. We have written multiple posts on why exactly this is the case, see here and here. Read-only access to production databases is often a good sweetspot to start with for troubleshooting, analytics, and various operational tasks, that in our experience solves 50%+ of all dev access requests. However, this access must be carefully managed to prevent security risks and maintain compliance. In this guide, we'll walk through how to set up read-only access for developers with comprehensive audit logging using Kviklet, so that your SOC2 or ISO 27001 auditor will be happy.
Why Read-Only Access?
Read-only access allows developers to:
- Troubleshoot issues: Quickly identify and resolve bugs by examining live data.
- Generate reports: Access production data for ad-hoc reporting without compromising data integrity. Of course ideally you have a working BI setup for this, but as explained in a previous blog sometimes this is just not sufficient (yet).
- Feature Development: Understand the data model and relationships to develop new features effectively. Typical questions are: Is this column nullable? What is the data type of this column? What is the distribution of this column?
However, without proper controls, this can lead to security risks, data breaches, or accidental data manipulation. This is where audit logs and access control come into play.
Setting Up Read-Only Access with Kviklet
Step 1: Deploy Kviklet
First, deploy Kviklet as a Docker container. Feel free to go to our repository and copy the docker-compose setup. Otherwise here's a quick setup guide:
-
Prepare the Database: Kviklet needs its own database to store metadata about queries, connections, and approvals. Although you can use MySQL, Postgres is recommended. You can find the official image here: https://hub.docker.com/_/postgres.
-
Start the Docker Container:
docker run \
-e SPRING_DATASOURCE_PASSWORD=postgres \
-e SPRING_DATASOURCE_USERNAME=postgres \
-e SPRING_DATASOURCE_URL=jdbc:postgresql://localhost:5432/kviklet \
-e INITIAL_USER_EMAIL=admin@example.com \
-e INITIAL_USER_PASSWORD=someverysecurepassword \
--network host \ # Use host network for simplicity otherwise kviklet just uses port 80, which you can also expose instead.
ghcr.io/kviklet/kviklet:main
If you see
Tomcat started on port(s): 8080 (http)in the logs, Kviklet is up and running. Don't be confused by the port though, There is an nginx proxy that makes sure Kviklet is accessible on port 80.
Step 2: Create a read-only user on the database
Kviklet needs a read-only user to access the database. This user should have the necessary permissions to execute read-only queries. Here's how you can create a read-only user in Postgres:
CREATE ROLE readonly_user WITH LOGIN PASSWORD 'password';
GRANT CONNECT ON DATABASE your_database TO readonly_user;
GRANT USAGE ON SCHEMA public TO readonly_user;
GRANT SELECT ON ALL TABLES IN SCHEMA public TO readonly_user;
ALTER DEFAULT PRIVILEGES IN SCHEMA public GRANT SELECT ON TABLES TO readonly_user;
If you have specific tables that the user should not have access to, you can also revoke the SELECT permission on those tables. If you use MYSQL or Microsoft SQL Server you might want to ask your favorite AI agent for help or look it up in teh documentation of your database.
Step 2: Configure Database Connections
After deploying Kviklet, log in to the web interface (http://localhost) and configure your database connections:
- Navigate to Settings -> Databases -> Add Connection.
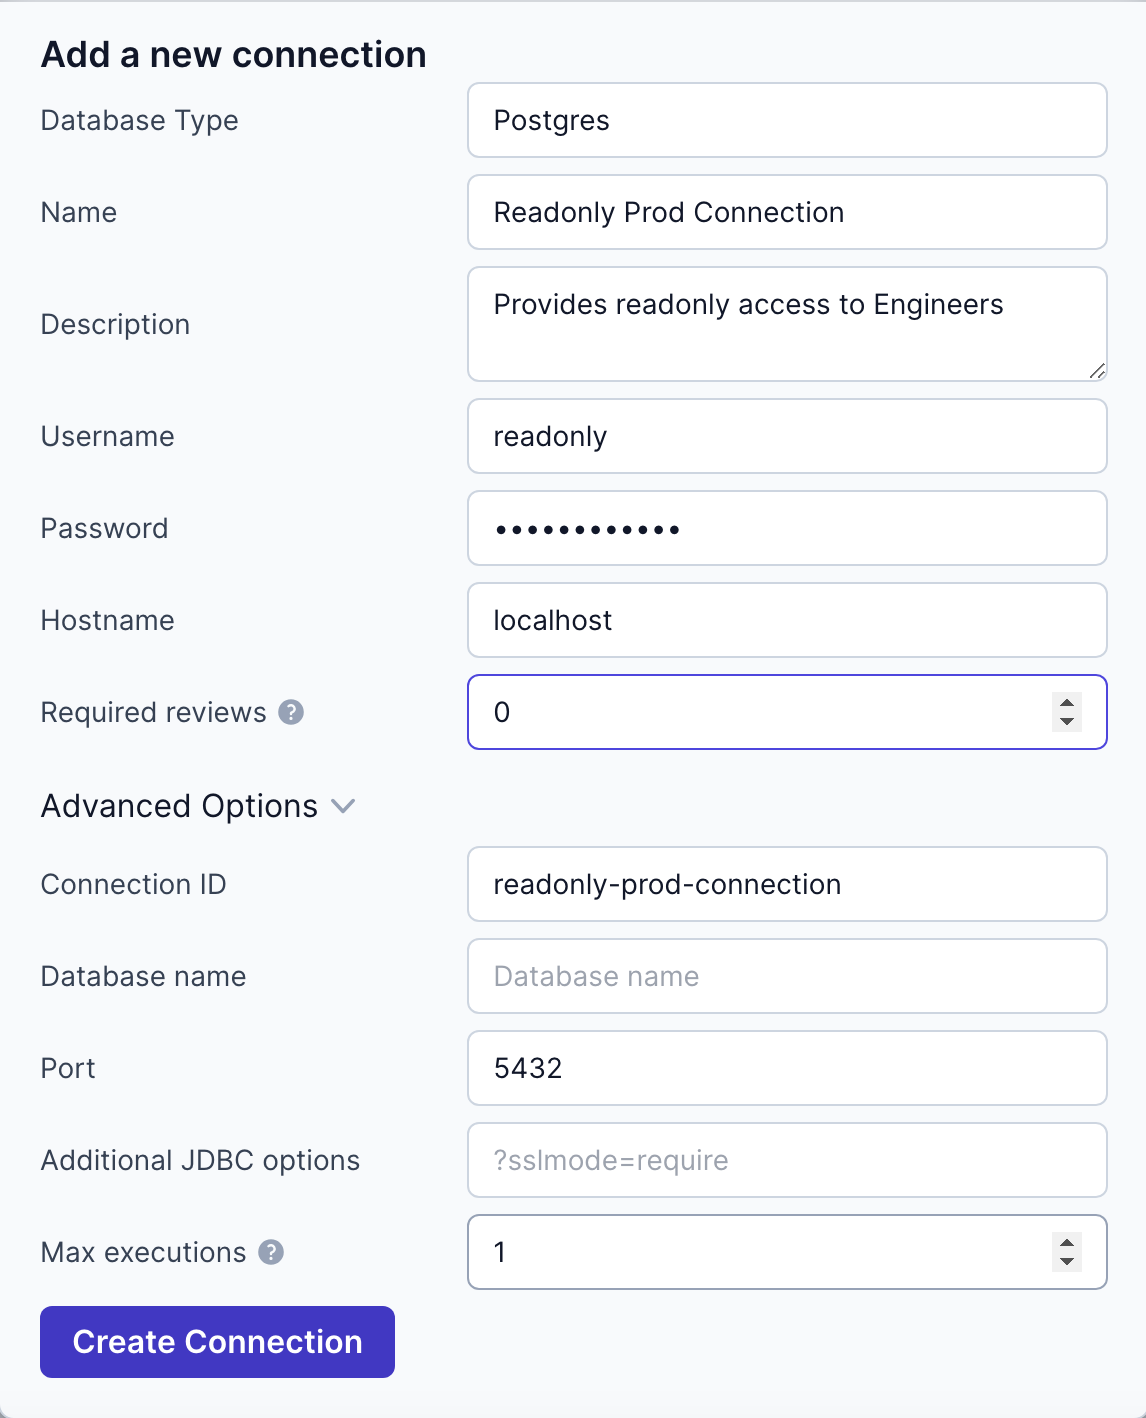
- Fill in the connection details for your production database. (username, password, host, port etc.)
- Configure the number of reviews required for running requests. If you simply want to provide every engineer with read-only access, you should set this to 0.

Step 3: Set Up Roles and Permissions
The default Developer Role allows developers to access any connection and create Requests. If you do not have any other connections set up yet, this is perfectly sufficient for read-only access. However, if you want to restrict access further, and add more connections (read separate database users) you might want to edit the developer role or create a separate readonly Role taht only has access to your new readonly connection.
- Create a Read-Only Role:
- Go to Settings -> Roles -> Create Role.
- Define the permissions for this role, by choosing the ID of you new readonly connection you restrict the access of any user with this role to this specific connection.
- Assign the Role to Users:
- Navigate to Settings -> Users.
- Assign the read-only role to the relevant users.
Step 4: Implement SSO for Authentication
Unless you want to create users for your developers manually and create passwords for each one, you should enable Single Sign-On (SSO) to streamline authentication and enhance security:
- Google SSO Setup:
- Obtain your Google client ID and secret by following Google's instructions.
- Configure valid redirect URIs:
http://[kviklet_host]/api/login/oauth2/code/googlein google. - Set the following environment variables in your Kviklet container:
KVIKLET_IDENTITY_PROVIDER_CLIENT_ID=your-client-id
KVIKLET_IDENTITY_PROVIDER_CLIENT_SECRET=your-client-secret
KVIKLET_IDENTITY_PROVIDER_TYPE=google
- Or Keycloak SSO Setup:
- Set up a client in Keycloak and obtain the client ID and secret.
- Set the following environment variables:
KVIKLET_IDENTITY_PROVIDER_CLIENT_ID=your-client-id
KVIKLET_IDENTITY_PROVIDER_CLIENT_SECRET=your-client-secret
KVIKLET_IDENTITY_PROVIDER_TYPE=keycloak
KVIKLET_IDENTITY_PROVIDER_ISSUER_URI=http://[host]:[port]/realms/[realm]
- Assign Roles After Login:
- After users log in via SSO, assign them the appropriate role in Kviklet. Alternatively you can simply edit the default role to give access to your new connection. Then you no longer have to do anything manually.
Step 5: Enable Audit Logging
Kviklet automatically logs all database interactions, providing comprehensive audit trails:
- View Audit Logs:
- Navigate to Audit Logs in the Kviklet interface.
- Review all executed queries, including who executed them and the reasons provided.
Step 6: Test the Setup
Before rolling out to the entire team, thoroughly test the setup:
- Create Test Users: Assign them the read-only role.
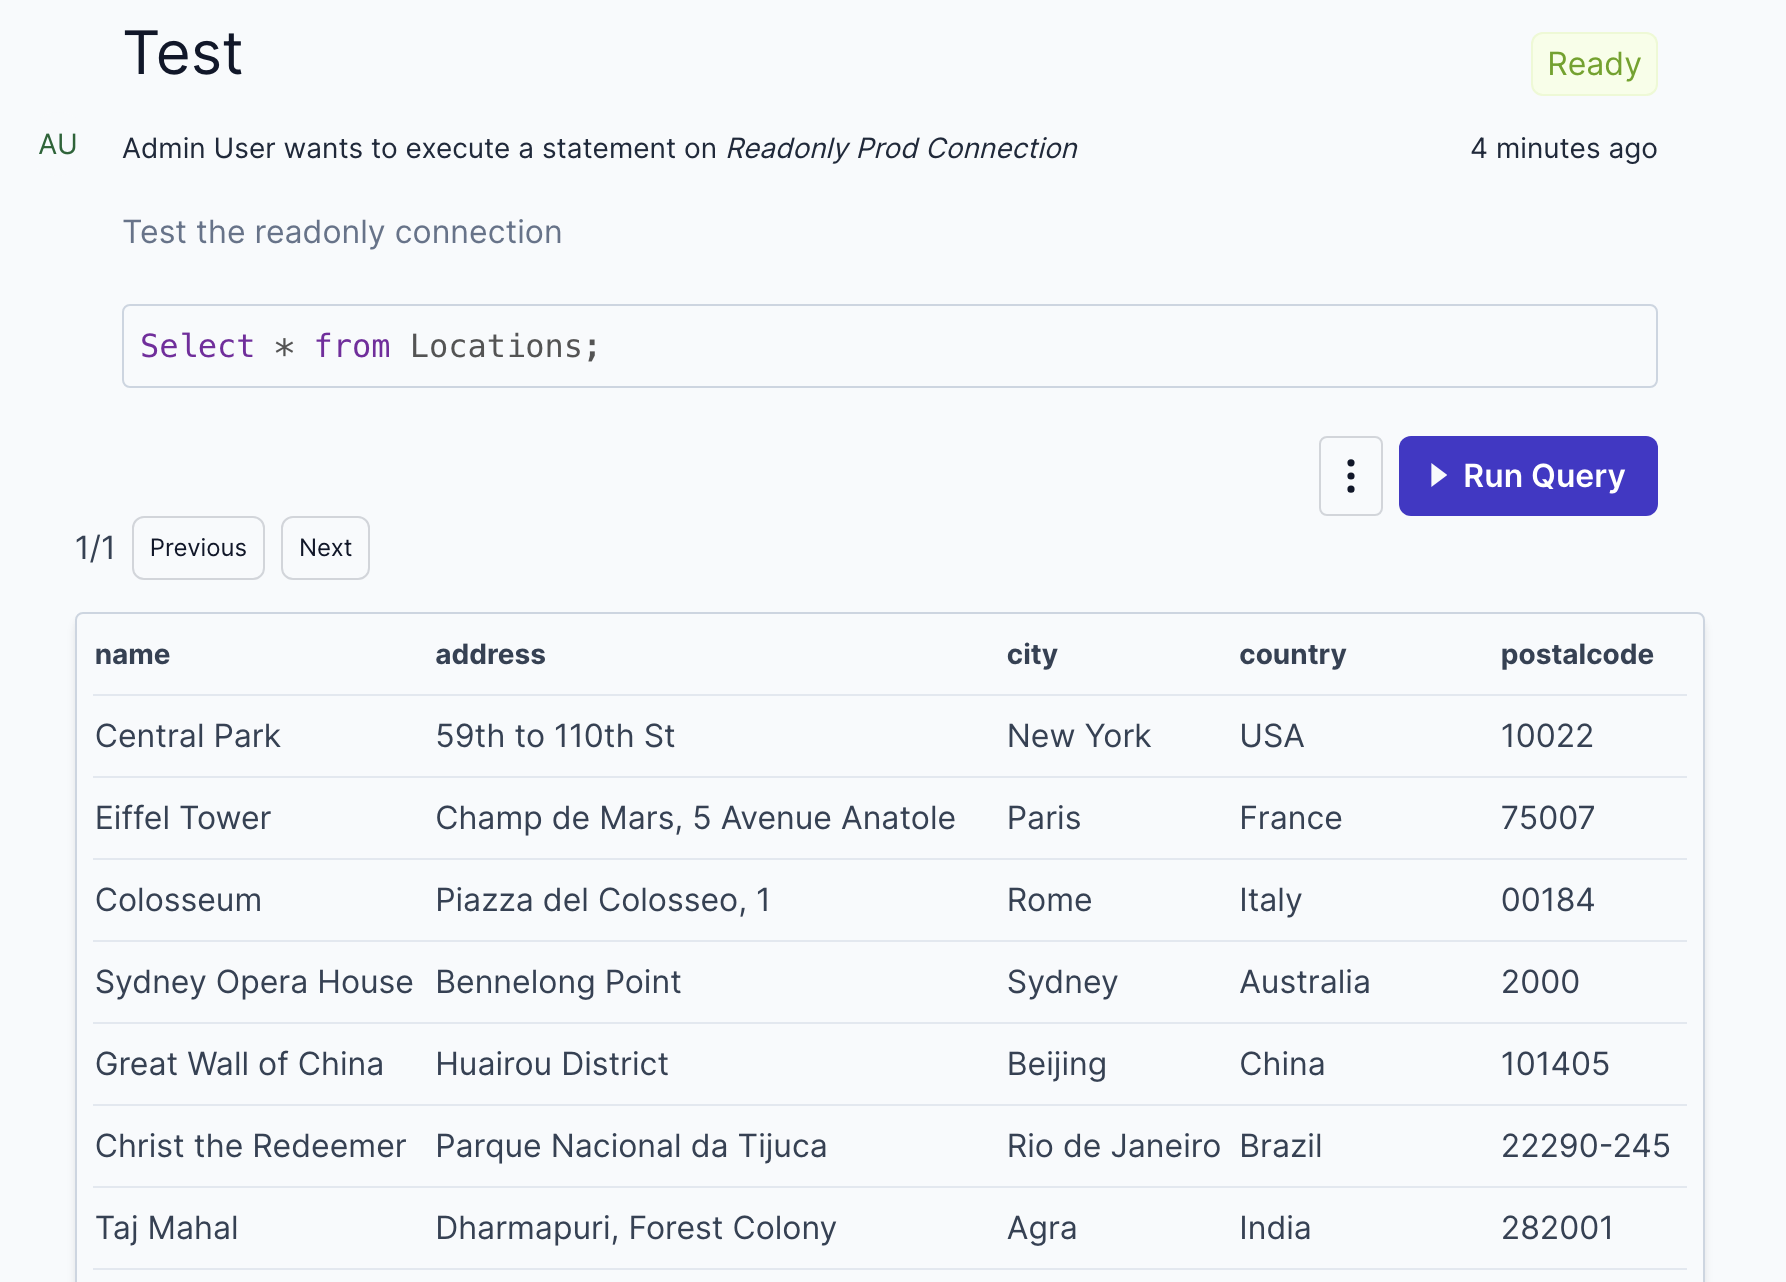
- Run Queries: Have them perform various read-only queries.
- Review Audit Logs: Verify that all queries are logged correctly.
- Congrats you now have a self service setup for your developers to access the production database in a secure and compliant way.

Conclusion
By following these steps, you can set up secure read-only access for your developers while maintaining comprehensive audit logs. This approach not only enhances security and compliance but also empowers your developers to work more efficiently.
Ready to get started? Deploy Kviklet today and take control of your production database access. For more detailed instructions and community support, visit our GitHub repository. If something doesn't work, or you're stuck somewhere or you want a new feature, don't hesitate to open an issue or reach out to us directly. We're here to help you out.
